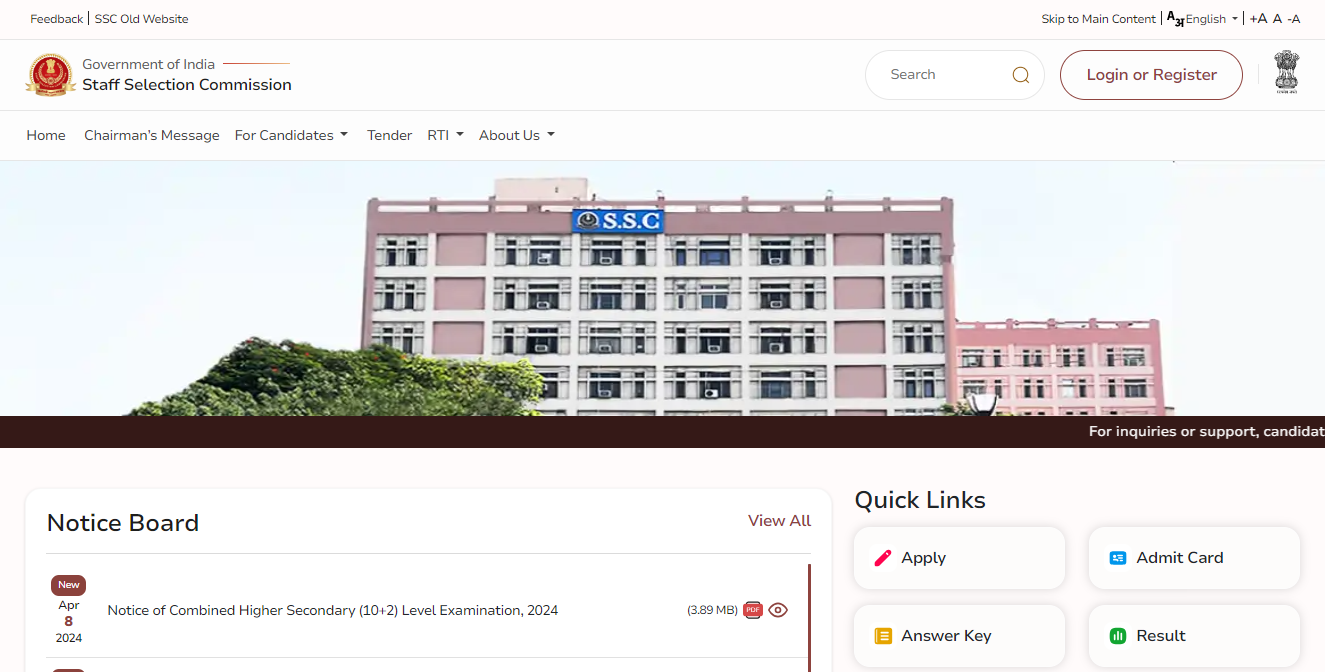
SSC CHSL Form Fill Up 2024
The SSC CHSL Notification 2024 has been released and the SSC CHSL Application Form Fill-Up process has been started through the official website of SSC at ssc.gov.in. Every year lakhs of candidates Apply Online for the SSC CHSL Examination 2024.

To Apply Online, candidates had to fill up the form for which applicants often have to visit cybercafes as they face many issues while filling out the application form on their own. Therefore, in this blog, we will provide you with a brief guide on the SSC CHSL Form Fill-Up for 2024.
We will provide you with a step-by-step guide for One-Time Registration (OTR) on the SSC website, filling up the application form, and making the payment to complete the submission process.
SSC CHSL Form Fill Up – Important Dates
We have mentioned below all the important dates related to the SSC CHSL Application Procedure for the candidates.
| Activity | Dates |
| SSC CHSL Notification 2024 | 8th April 2024 |
| SSC CHSL Registration Process | 8th April 2024 |
| SSC CHSL Last Date to Apply 2024 | 7th May 2024 |
| SSC CHSL Last Date to Payment Fees | 8th May 2024 |
| Correct Window Form Dates | 10th May 2024 to 11th May 2024 (23:00) |
| SSC CHSL Tier 1 Application Status 2024 | To be Announced |
| SSC CHSL Tier-1 Admit Card 2024 | To be Announced |
| SSC CHSL Exam Date 2024 (Tier-1) | 1st to 5th and 8th to 12th July 2024 |
SSC CHSL Form Fill Up Direct Link To Apply Online
The SSC CHSL Application Form link has been activated on the official website from 8th April 2024 till 7th May 2024 and the application fee for Gen/ OBC/ EWS is 100 Rupess and the application fee for SC/ ST/ PWD is Nill.
SSC CHSL Apply Online Link (Active)
CHSL Form Fill Up – One-Time Registration Process(OTR)
Follow the below-mentioned steps while Applying Online for the SSC CHSL Examination 2024:
Step 1: Go to the SSC Official website or Apply through the direct link provided above.
Step 2: Click on the ‘Login or Register’ button; select ‘Register Now’ from the menu or pop-up window.
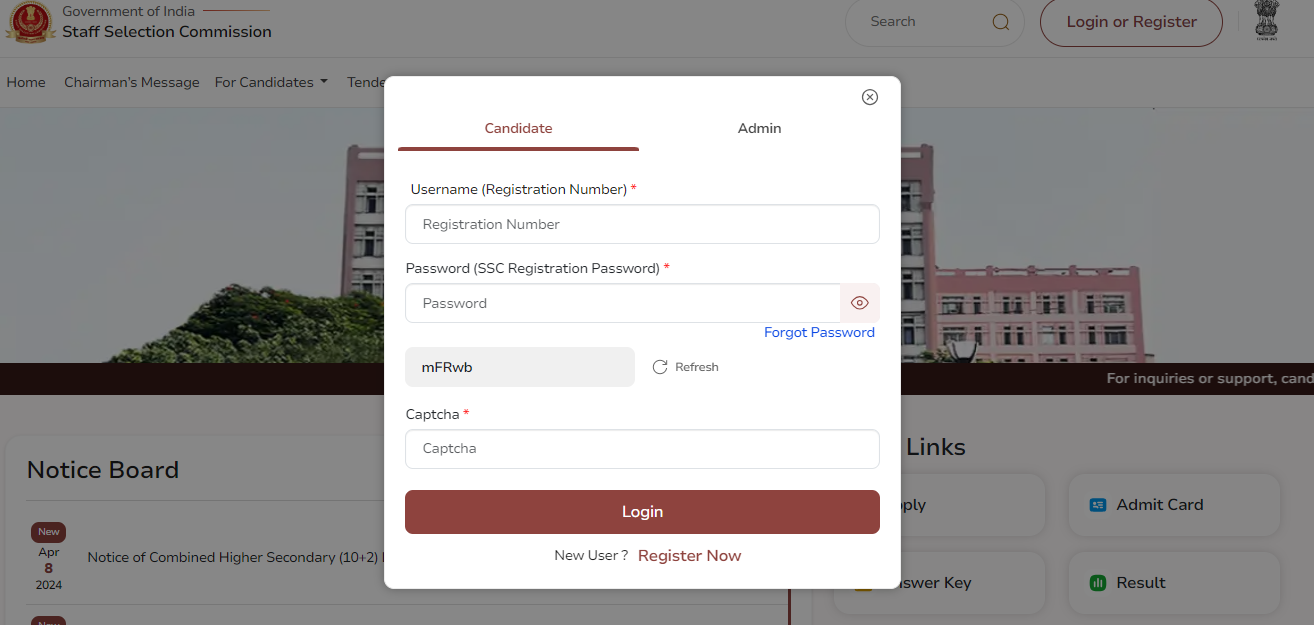
Step 3: Click on Register Now.

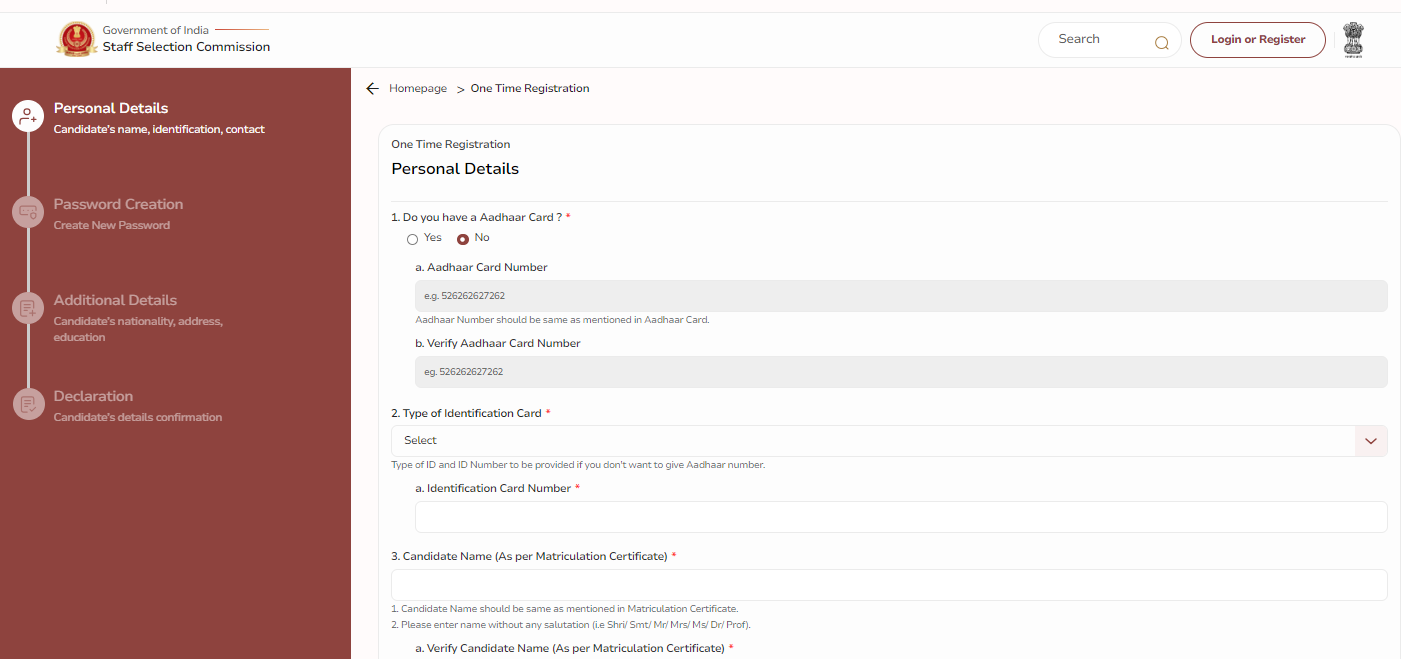
Step 4: Click On Continue and fill out all the details like Aadhaar Number, name, father’s name, mother’s name, and date of birth twice to ensure accuracy. Any discrepancies will be highlighted in red text.
Your mobile number and mail ID will be Verified using OTP in your mobile number and Mail ID respectively.
Step 5: Click on Save Next. Users will be redirected to the registration details page,
displaying the Registration Number. The Registration Number and Password will be sent to the user’s mobile number and Email ID. The registration process must be completed within 14 days; otherwise, the saved details will be deleted.
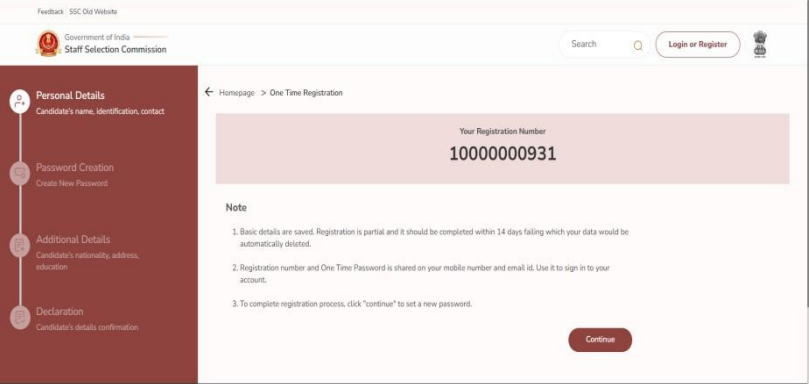
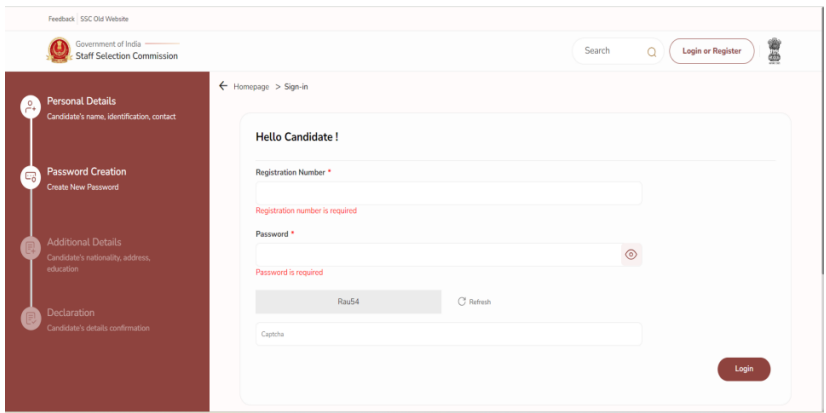
Step 6: To finish signing up, users can press ‘Continue.’ Then, they’ll see the login page. If they decide to finish signing up later, they can log in by clicking ‘Login or Register’ at the top of the website. They’ll use the Registration Number as their username and the password sent to their phone and email for the first login. When they log in for the first time, they’ll need to create a new password.
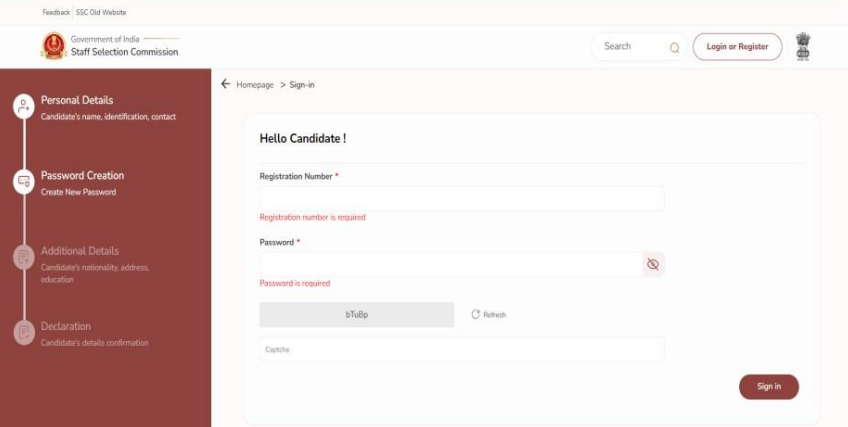
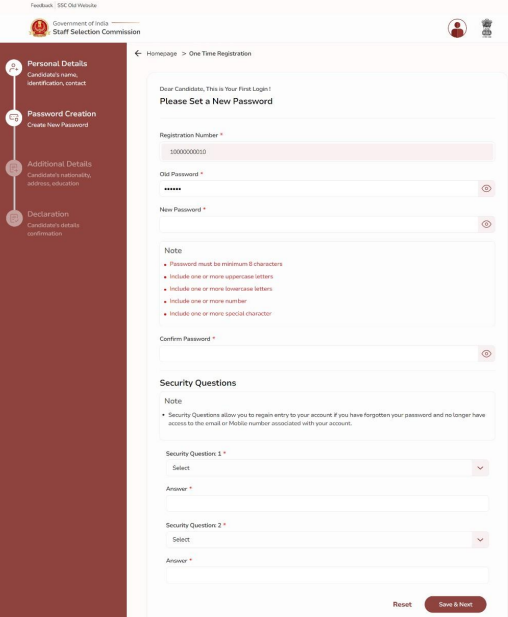
Step 7: When users first log in, they’ll go to a page where they can create a new password. Once they’ve changed it successfully, they’ll go back to the login page. There, they’ll need to log in again using their Registration Number and the new password they just created.
The Registration Number will already be filled in. To change the password, users need to enter the old password sent to their phone and email. Then, they can set a new password following the rules shown on the screen.
Step 8: After changing their password successfully, users will see the next screen. Once they log in, they’ll go to another page where they can provide additional details.
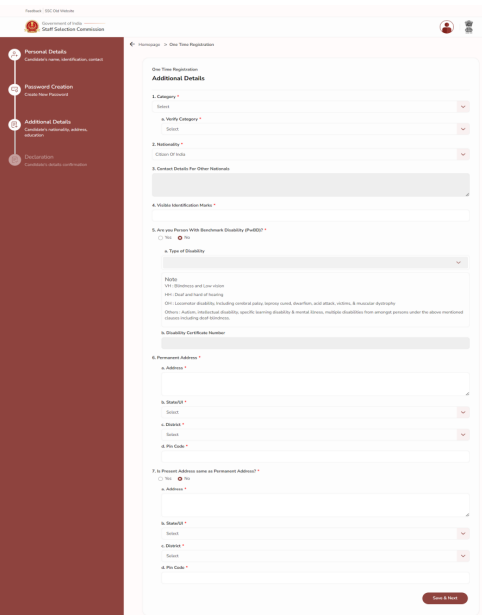
Step 9: To finish providing additional details, users need to give information about their Category (Number 1) and Nationality (Number 2). If their nationality isn’t ‘Citizen of India,’ they should turn on ‘Contact Details for Other Nationals.’ For Indian citizens, they should fill in their permanent and current addresses.
If the nationality is different, they can leave these fields blank. Also, users should provide details about any visible identification marks (Number 4) and any disabilities (Number 5), including the Disability Certification Number if applicable. If the nationality field is empty, users should enter their permanent and current addresses before moving on to the final part of the registration.
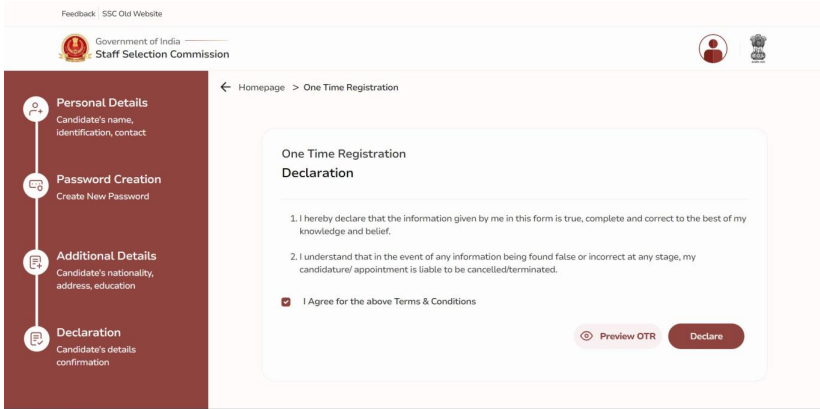
Step 10: After reading the declaration carefully, users need to tick the box that says “I agree” next to “Preview OTR.” Then, they should click on the “Declare” button to submit the declaration. Once it’s successfully submitted, users will go to the dashboard.
After Submitting the Registration declaration candidates will be redirected to the Login page where candidates have to log in using their New Registration Number and the Password they had created to fill up the SSC CHSL Application Form 2024.
SSC CHSL Application Form Fill-Up Process
Follow the steps while filling out the SSC CHSL Application Form 2024:
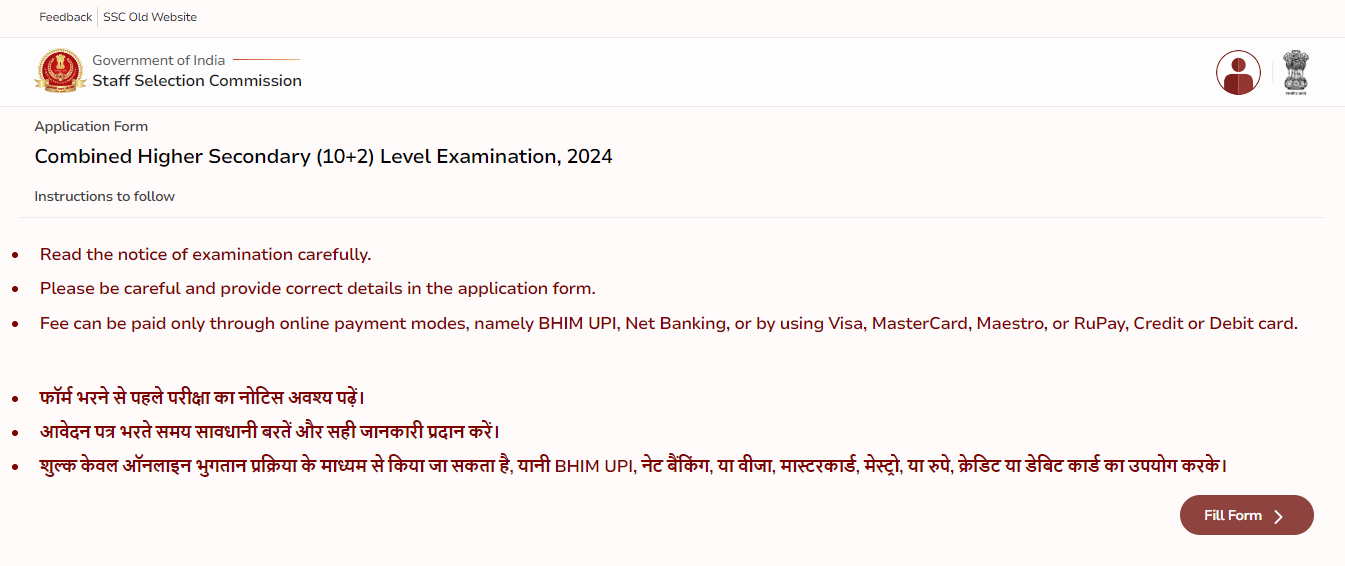
Step 1: Log In using your Registration Number and Password after that click on Apply For Combined Higher Secondary Level (10+2) Examination.
Step 2: Click On Fill Form.
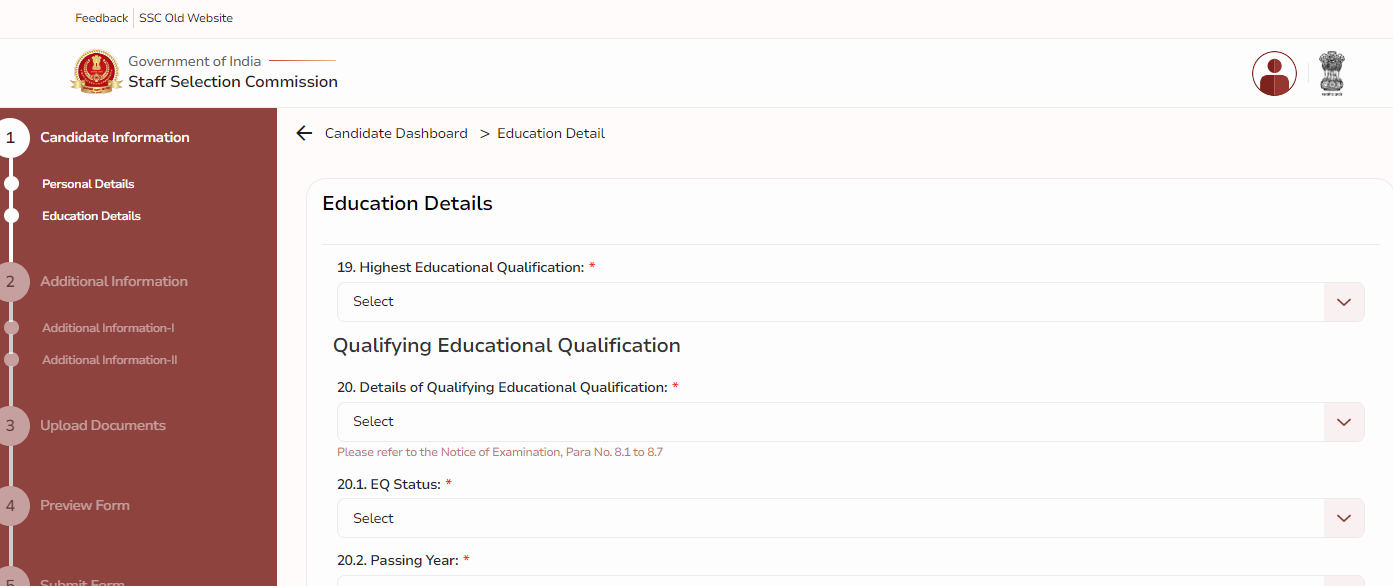
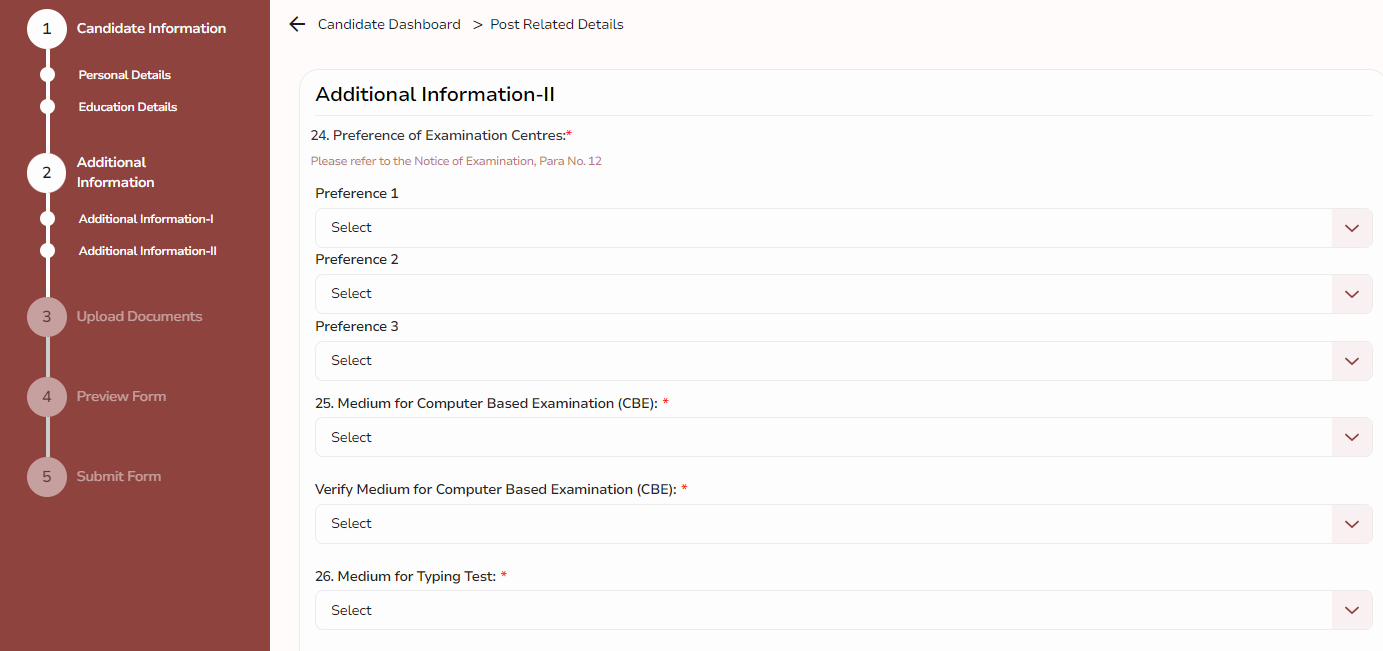
Step 3: Fill out Educational and additional details then click on Save Next.
Note: Candidates who have passed from CBSE Or ICSE Board select State/UT Of Board Or University as DELHI.

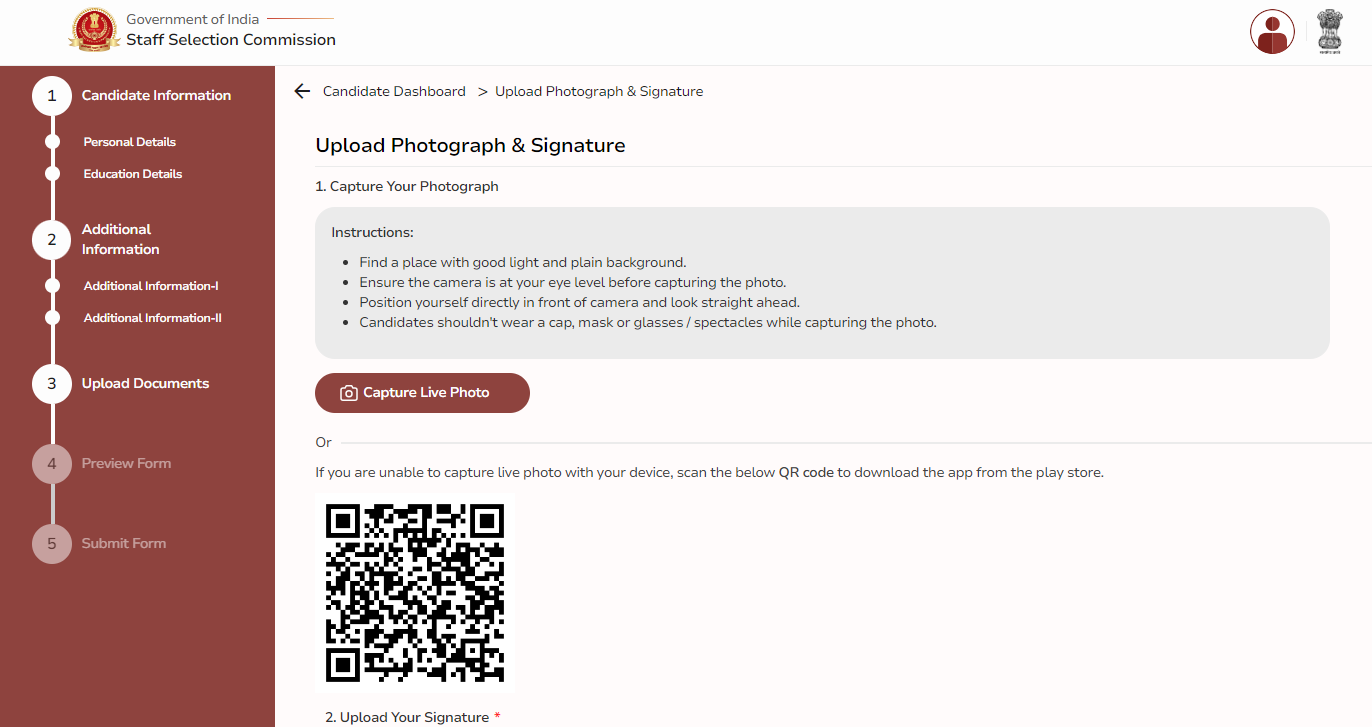
Step 4: Candidates had to Upload their Signature and Photograph.
This year, a new process has been implemented for uploading photographs. Candidates are no longer able to upload previously taken photographs. Instead, they must capture live photographs using a laptop camera, webcam, or by scanning the QR code and downloading the SSC App. After registering using their OTR ID and password, candidates must capture a live image against a light background using their mobile camera. Signatures can be uploaded as a JPEG image with a file size between 10 to 20kb from their saved images.
Note: The photograph should not be blurred; otherwise, it will not be saved and uploaded in the application form.
Step 5: Candidates had to preview the Application Form and submit the application fees using BHIM UPI, Net Banking, by using Visa, Mastercard, Maestro, RuPay Credit, or Debit cards.
Step 6: Once you have submitted your application form, it’ll be accepted provisionally. Remember to print out a copy of the form. You’ll have to hand it in to the Commission later, after the Computer-Based Examination, if they ask for it. Make sure to keep a copy for yourself too.
We hope this blog gave you a brief description of the SSC CHSL Form Fill-up 2024. To read more such blogs, visit the Oliveboard website!

- SSC CHSL 2024 Apply Online, CHSL Application Form Link
- SSC CHSL Syllabus 2024, Download Tier 1 And 2 Syllabus PDF

- SSC CHSL Full Form, All You Get to Know About SSC CHSL

- SSC CHSL Application Form Fill Up 2024, Complete Guide

- SSC CHSL Cut Off 2024, Last 09 years Cut Off Marks

- SSC CHSL Previous Year Question Paper With Solution
SSC CHSL Form Fill Up 2024 – FAQs
The last date to Apply Online is on 7th May 2024.
The last date to submit the Application fee is on 8th May 2024.
No, this year candidates are required to upload live photographs using a laptop camera, webcam, or mobile camera.
The photograph should be taken on a light background and should not be blurred. Signatures can be uploaded as JPEG images with a file size between 10 to 20kb.
Candidates who passed from CBSE or ICSE boards should select “DELHI” as the State/UT of the Board or University.
Oliveboard Live Courses & Mock Test Series
